DIY Baby Photography Tips for Pro-Quality Pics at Home
What is it that makes professional baby photographs so much better than the ones you take? In the world of high-tech digital innovation, where iPhones and Android phones have higher-quality cameras than the typical pro photographer of yore, you have the ability to take stunning photographs of your baby – and growing child – over the years.
Yes, there’s much to be said for the artist’s eye, but the “secrets” to capturing gorgeous photos of your newborn’s infancy and babyhood (and beyond!), are contained in the following tips.
Safety always comes first
The “Safety first” motto is never more true than with newborn photography. Don’t use professional photography galleries as your idea tanks. Many of the images you’ll see there are meticulously created – and heavily edited afterwards to cut hands, supports, etc., out of the final photo. This allows us to make babies “look” like they’re positioned in ways they never were.
Always place your baby on a completely stable background, and ensure s/he’s fully supported for every picture you take. Never leave your baby unattended for a second, even to “grab one quick thing,” and never risk his or her safety in the quest for artistry.
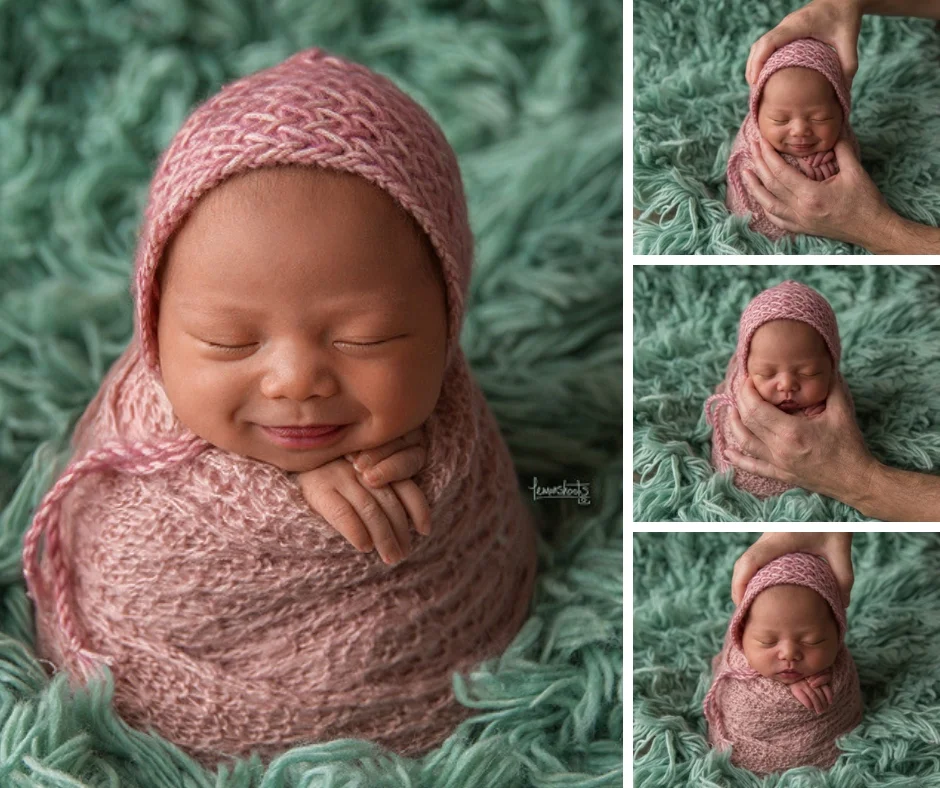
The super cute Potato Sack pose is achieved by merging at least two images together. Baby should always be supported, since their necks are not strong enough to hold their heads.
Think about close-ups and drop the plans for grandiose scenery
Unless you’re capturing your baby on a blanket in a pasture full of spring wildflowers (where the background is part of the concept), the most captivating baby photos are usually taken at very close range. This is good news for you as a parent with no time to tidy the house or set up a professional photography studio.
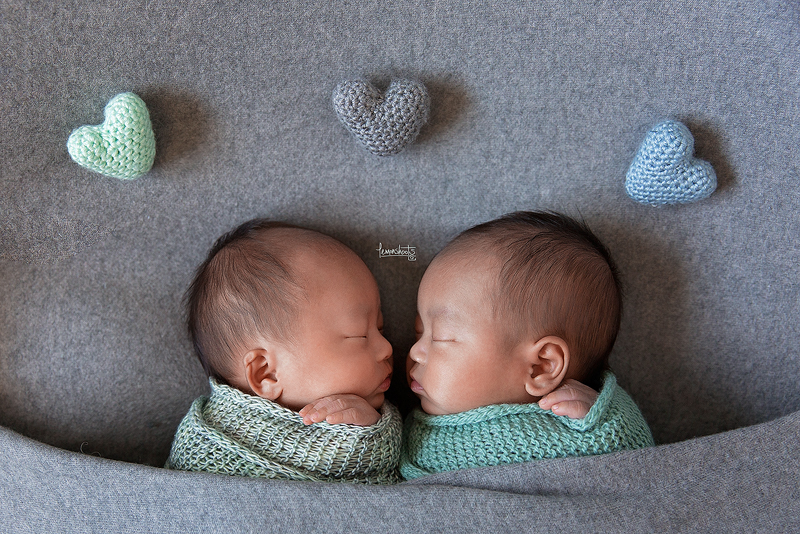
Backdrops are surprisingly simple to find; all it takes is a swatch of fabric, your favorite soft sweater with a thick cable knit pattern, the backside of a vibrant blanket that’s been given the once- or twice-over by the lint roller to remove the pet fur, or even a black bean bag or dark, solid—colored sheet (great for black-and-white photos). These are all examples of typical baby photo “backdrops.”
When you lay baby on top of it, or set her in front of it – the rest of the world will disappear and nobody will ever know all the laundry was piled up just to the left of the shot. A bean bag or comfortable couch cushion set on the floor makes things more comfortable, always ensuring baby can’t roll off.
Choose a room with diffusible daylighting
Natural light is the best light if you don’t have professional lights, filters and all the rest of that equipment. However, playing with light here and there can change the feeling and composition of the shot. So, if you have a room with great access to light, combined with shades, blinds or another way to alter/diffuse how much light is coming in at one time – your pictures will be the better for both the quality of the light, as well as your ability to play with it.
Some tricks for using natural light:
Try to aim for a 45-degree angle on your baby’s face (direct light is harsh and hurts baby eyes)
Choose a time a day that respects baby’s naptime (more on that later) but isn’t high-noon, when light is less interesting. Late mornings and late afternoons have a golden quality to the lighting, hence they are referred to as “the golden hours” by photographer.
Take selfies in the proposed spots and see what you think. Good lighting for you means good lighting for baby!
Avoid allowing the light source to come from directly above or below your baby’s face.
Have a sliding door? This is a great way to optimize light, otherwise a large picture window will do the trick.
Think about texture as well as color
We referenced a few different backdrops above, but here are some points to emphasize re: the backdrops and props used:
Textured backdrops, like the aforementioned sweater, a sheepskin or that awesome shag area rug (you just cleaned) are great for texture.
In general, neutral and softer colors are the best for showcasing sweet, soft baby skin – but as your baby gets older, vibrant color combinations that highlight/contrast with apparel, eye color, a prop, etc. are also fun to play with.
Keep props to a minimum for newborn photos since the baby is the star. That being said, some props are too perfect to resist.
Spend some time preparing
Prior to arriving at a newborn photography shoot, we give our clients a list of preparation guidelines Most of them also apply to you for your DIY, in-home photography studio, including things like:
Feed baby right before you plan to shoot the pictures since “milk drunk” babies are happier babies.
Try to time the session with sleep time.
Change baby and wrap him/her in a warm blanket (a space heater is helpful most times so baby is never chilled in between shots – particularly if parts of their bodies are exposed).
Don’t plan anything else that day so time doesn’t become a stressor.
Photograph your baby at least two days after vaccinations and at least five days after a circumcision to minimize potential fuss and discomfort.
Don’t stress out about getting results as your stress causes him/her to be more agitated. Just take your time and feed, change, cuddle, etc. as needed to soothe your precious baby.
Practice photographing a dog, cat or stuffed animal to test lighting and your ideas so baby reaps the benefit of your newfound photography wisdom.
Our digital era allows you to take hundreds of different shots. From those, you’ll learn lots about what works and what doesn’t. Take your time, enjoy the process and you’re guaranteed to take baby photos you’ll love.
